Sunday, September 4, 2016

Hobie 16 - Day 1 Repairs

Quick list of thing I accomplished on the first day of the rebuild;

was bolted too;


Removed the mast from the trailer so I could remove the upper mast holder.  The holder itself was a wooden cradle with carpeting for cushioning.  It has seen many seasons it appears and was in dire need of replacement.  Researching best way to either build, or buy something.


Next up was the mast head - for some reason my 1984 does have the comp tip head on it even though that wasn't standard equipment until 1986 as I understand it.  Looking at the head here you can see a serious ding that would start slicing into the line.  A quick pinch or three with a pliers and I was able to put that right.  


Friggin amazing what some car wash soap, cold water and a stiff nylon brush can do to clean up a very dingy hull!  It's nowhere near perfect, but again it's a brand new 1984 model...  I was extremely pleased with how well the upper hulls cleaned up.


Quick shot of the "after" cleanup.  I also hit the following items;


  • Removed busted triple light on the center rear of the trailer
  • Ground off rusty grounding screw, redrilled and added new ground screw for lights
  • Taped up all trailer electrical connections to prevent water corrosion
  • Removed two front trap lines as they are not coated and have been causing damage to mast and trampoline side bars (prob tech term for that but I don't know it yet)
  • Examine all parts and put together a parts list of needed replacement parts, such as rudder cams, parts with bad pulleys, etc.


Friday, September 2, 2016

Hobie 16 - the saga begins!

I pulled the trigger.  Found a Hobie 16 catamaran on Craigslist and bought it!  It's a 1984 Nationals Yellow model that I picked up from a very nice guy in Storm Lake IA.  


This is the photo from the ad.  Also this shows the older sails and it came with newer ones.  The sails themselves are in nice shape.


These are the current (newer) sails for it.  


I'm beside myself excited to start fixing it up and get it out on the water.  I'll detail some of my repairs here and upload more photos as I go.  One of the first things to fix is we busted out the mast step area where the pin goes so I need to replace that (fixed).  Also it needs trampoline repair (Have a new one on hand, just needs to be installed). 


And I picked up a submersible VHF radio, a couple floating flashlights and a couple whistles for safety! Can't be too careful right?!  Peace of mind anyway.

Wednesday, March 9, 2016

Toshiba SA-400 Receiver - refurb

So we were cleaning out my dad's attic in his old house and I ran across this receiver;


Turns out it's an old Toshiba AS-400, basically the bottom of the line receiver for it's day, but still pretty classic 1970s-1980s looking machine!  I thought I'd try and restore it a bit and get it working.  I plan to use it in the basement by my electronics workbench.  Here are a few more "before" shots;


Next shot here shows 2 bulbs out on the dial as well - hopefully easy to replace!


So next step, disassemble and scrub like mad!!


Surprise surprise, wiggle the little bulbs around a bit and they all fired up!  Nice!


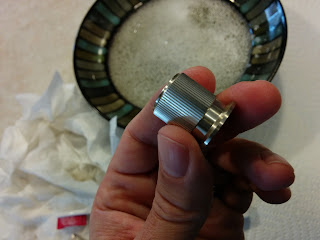
I wasn't too sure about the knobs, they seemed to be almost rusty, but they cleaned up just as well as the front bezel!


Learned that from AudioKarma website - use dawn detergent, warm water, and wife's toothbrush!  Well wife's OLD toothbrush that she doesn't use anymore...  really!

Here is the end result, not bad, still need to find a knob for the missing tuner area but otherwise I think it's the best the old girl has looked in decades!


So now, after I "de-oxed" all the volume/balance/switches etc. she's playing pretty nicely!  All the scratchiness is gone from the volume control and I only have a couple switches to still take apart and clean.  I am a little disappointed in the FM tuning capability here, but I have more playing around with that to do.  AUX input is working well, ipod was able to jam quite well (or as well as a 30 Watt receiver will push some small speakers).  Overall I'm quite happy with the outcome and will post a couple more shots when it's all buttoned up and in place.  

And complete!  Works pretty well, line in sounds great!  The switches were sealed up but I was able to put them midway through their throw and shoot some deoxit in the small gap from the front.  Did the trick and now they are all working as well.